
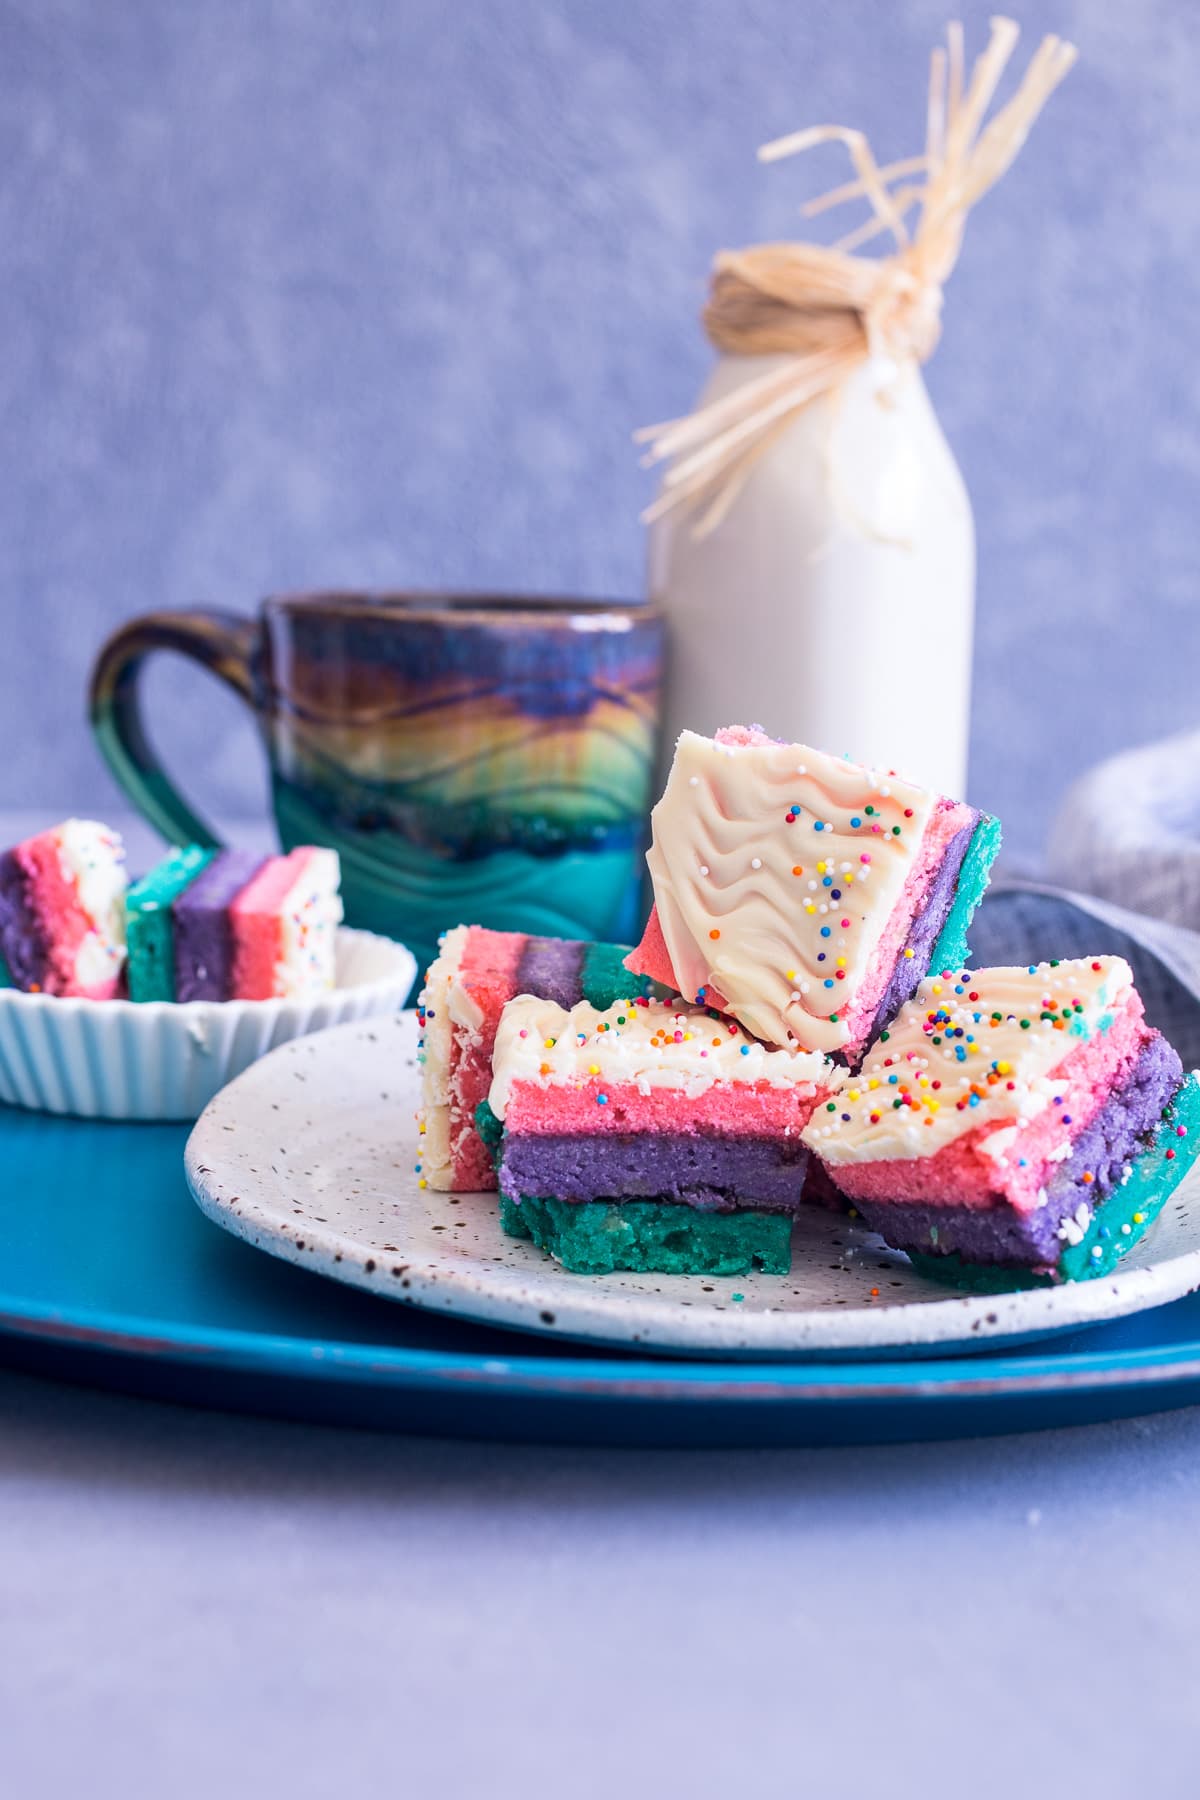
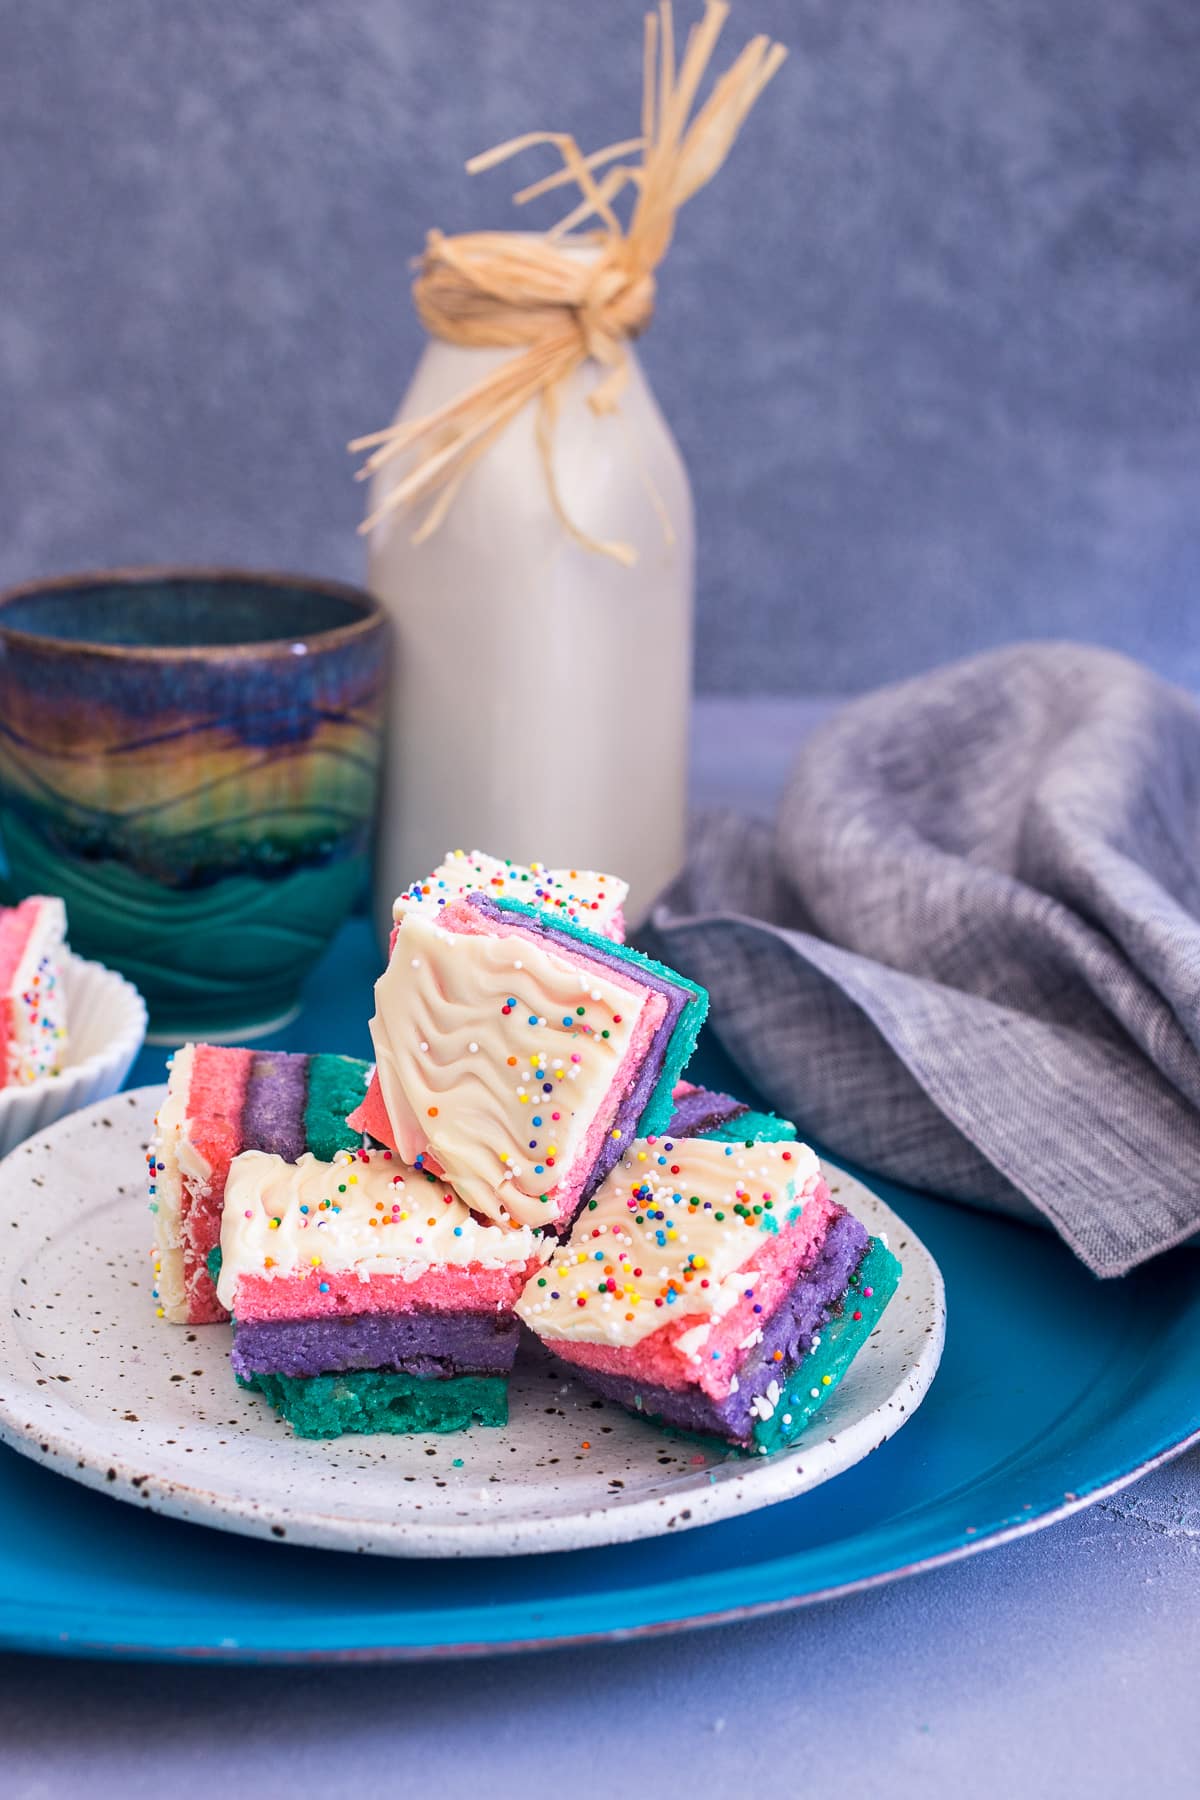
Add a big dash of color to your Easter or Spring dessert table with Italian Rainbow (rainbow!) Cookies.

The last few weeks I’ve been in planning mode for a wedding I’m catering at the end of April. Most of the wedding work I’ve done in the past has always been cookie favors for the happy couple but this time it’s slightly different. The bride and groom are requesting a big, Italian cookie dessert table for their wedding plus a s’mores bar to be brought out a little later in the night. I’m excited to be working on this for a couple of reasons 1) It’s a fun experience for me and of course #allthecookies 2) Why didn’t I think of this for my wedding!! and 3) I’m doing it for one of my oldest and dearest friends, which makes it even a little more special.
Of course anytime I tackle recipes that are a little bit new to me I need to test things out first. Not only to make sure they taste great but to get an idea how what a single batch will serve and how to scale up from there.

Italian Rainbow Cookies are hardly new to me – if you grew up on the East coast, especially in an Italian or Jewish home they made a regular appearance at any holiday table or family get together. However I had actually never made them before.
These cookies are really a cross between a cookie and a cake – almond flavored, it’s a thick batter that’s separated into three individual batches and colored. Traditionally the color of the Italian flag, red, green and one layer left un colored for the white. Each layer is baked on a rimmed baking sheet, cooled, stacked with a layer of jam in between and then chilled overnight with a weight on top to essentially “glue” and flatten the cookies out a bit. They are finished with a coat of chocolate on top, trimmed to size and ready to disappear off your platter before you finish your cup of coffee.
Rainbow cookies are beloved, a good bit of work but once you taste a homemade versions versus store bought, you’ll totally see why its worth it.
And while there is nothing special or completely different in this base recipe for these Rainbow Cookies, I thought to myself if I’m going to test it out, I’m going to make it a little bit fun. Plus I mentioned to the bride and groom if they wanted to stick with traditional colors or go fun.
These guys are such a fun addition to your Easter menu or any Spring fling you might be getting ready to throw together. The only real change is swapping out that top layer of dark chocolate for white and sprinkles, because why not?
I’ve lovingly started to call these guys rainbow rainbow cookies. How else would you describe it?
 Save Recipe
Ingredients
- 4 large eggs, room temperature, separated
- 1 1/4 cup unsalted butter, room temperature
- 8 ounce almond paste
- 1 cup cane sugar, divided
- 1 teaspoon almond extract
- 2 cups unbleached all-purpose flour
- 1/2 teaspoon salt
- Pink, Purple & Teal gel dye
- 1 cup raspberry jam
- 6 ounces white chocolate, melted
- birthday cake or non-pareil sprinkles
Instructions
- Heat your oven to 350 degrees and grease and flour 3 jelly roll or rimmed baking sheets (about 9x13 size sheets or 1/4 size baking sheets)
- In a clean mixing bowl add the eggs whites and 2 tablespoons of cane sugar and using the whip attachment beat on medium high until you reach firm peaks. Transfer to a clean mixing bowl and set aside.
- Add the butter and almond paste to the mixing bowl, attach the paddle attachment and mix on low speed and then medium until the butter is broken up about 2-3 minutes. Add in the remaining sugar, mix on medium until light and creamy.
- Beat in the egg yolks and almond extract until smooth. Scrape down the sides of the bowl and add in the flour and salt in 2 parts.
- Remove the bowl from the mixer and take about 1/4 of the beaten egg whites and incorporate into the batter to loosen it up a bit.
- Then gently fold about 1/2 of the egg whites into the batter, careful not to deflate them too much, it's fine if there are some white streaks left. Repeat with the second half of egg whites.
- Using a kitchen scale, weigh out the batter into 3 even portions and tint each portion with the gel dye to your desired color.
- Spread the batter on the prepared baking sheets - it's fine if the batter does not reach to the edge of the pans and bake for 8-10 minutes or until the edges start to brown very slightly. The finished cookie will have a slightly underdone look to it when you take it out from the oven. For even baking, bake each layer separately.
- Let each layer cool completely and then carefully remove from the pan.
- Starting with the teal layer on the bottom, using a offset spatula spread 1/2 of the jam in an even layer on the cookie and then top with the purple layer. Repeat and top with the pink layer.
- Transfer back to a clean sheet pan lined with parchment paper. Place another layer of parchment paper on top and then a sheet pan on top of the parchment.
- Weigh down with books or heavy items in your refrigerator.
- Chill in the fridge for at least 6 hours or overnight.
- Once chilled, remove from the fridge, uncover the top layer holding it all down and then spread on the melted white chocolate, making sure it only covers the top of the cookie. Sprinkle with the rainbow non-pareils before the chocolate cools.
- Once cool, trim the edges so that they are even and cut into bars to serve.


Oh my god, these look amazing. Have you tried with almond flour? Or any other kind? We can’t have regular and I want to make them!
Thank you so much Amanda! I have not tried with almond flour or any other kind. My best guess is to try with 1 to 1 GF since you can’t have regular. As it’s the best substitution without having to make any other changes to the base recipe.
I tried making these and had a terrible time cutting them! The white chocolate would nOT cut without cracking. Any tips PLEASE! I’m tryin to make them for my girlfriend’s Bridal shower! Thanks
Hi Ziva – if I remember correct I precut the cookies before adding the white chocolate and then dipped the knife in hot water when cutting with the chocolate on top. However some did crack for me too. A simpler option that I’ve found later on is just doing a white chocolate ganache instead of straight up melted chocolate and this way the top won’t crack on you.
Oh and another option is if you don’t want to use the chocolate ganache, you can cut each square and then enrobe it with the white chocolate.