
Rainy days with no plans, usually equals a baking or cooking project for me and since I was home alone all day that meant I would be baking (plus, I loathe to keep the oven on for long periods of time during the summer).
I had a block of cream cheese sitting in my fridge for quite some time now and it was begging to have something done with it. I wasn’t feeling cake or traditional cupcakes, but cupcake bites would do. I already had everything sitting in my pantry, all I needed was some cake mix* and m&ms and I was ready to go.
*I’m not a cake mix person, but so much work goes into making cupcake bites that you have to short cut somewhere and the cake part really isn’t the star here, so that’s where it was going to happen. I personally recommend Trader Joe’s chocolate cake mix – it’s the best tasting out of the bunch. I do make my own frosting, since the canned stuff is just too sweet and that recipe will be posted below.
What you will need:
1 box of chocolate cake mix – baked in a 13X9 pan
1 1/2 – 2 cups cream cheese frosting (recipe below)
1 flower shaped cookie cutter (1.25” wide – but I think mine is smaller)
8oz semi-sweet chocolate or 1 package “chocolate” candy melts
1 package candy melts – I had white on hand, you can use any color of your choice
1 small bag of m&ms
sprinkles or any other items you wish to decorate with
First bake up your cake according to the package instructions. Once the cake is done, let it cool completely. The cooling processes is speeded up if you take a fork and mash up the cake – you’ll have to do it later anyway.
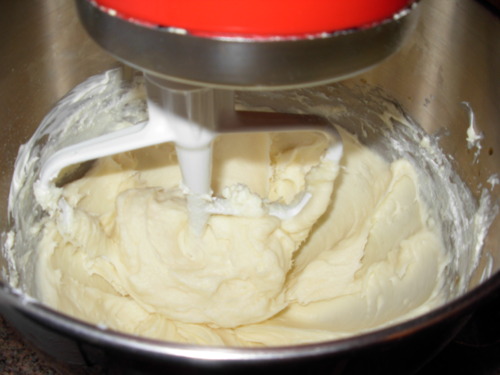
While the cake is baking go ahead and make the cream cheese frosting.
Recipe:
8oz cream cheese – room temperature
1/2 cup butter – room temperature
1 1/2 cups confectioners sugar
1 teaspoon vanilla extract
Using a stand or hand mixer, cream your butter and cream cheese until combined. On a low speed at the confectioners sugar, towards the end mix in the vanilla extract. Mix until completely smooth.
Makes a little more than 1 1/2 cups of frosting.
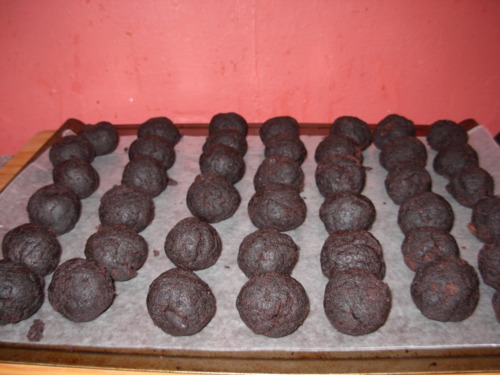
After your cake is completely cooled mix it together with the frosting. I don’t recommend adding all of the frosting all at once, I find the consistency of the cake/frosting has a lot to do with the humidity in the air so use your judgement on this one, but you want to be able to mash the cake into a ball and have it stay together.

Next you will roll the mixture into balls approximately 1.25 – 1.5” in diameter, I found it helped to use my cookie scoop for even sized balls. Place on a wax paper lined cookie sheet and chill in your refrigerator for several hours or your freezer for 15-20 minutes.
After the balls are completely chilled, you’ll need to roll it into an oval to fit into the cookie cutter, I found that everything works better when the mixture is cool, so I suggest chilling in the fridge for another 15 minutes after you are done. 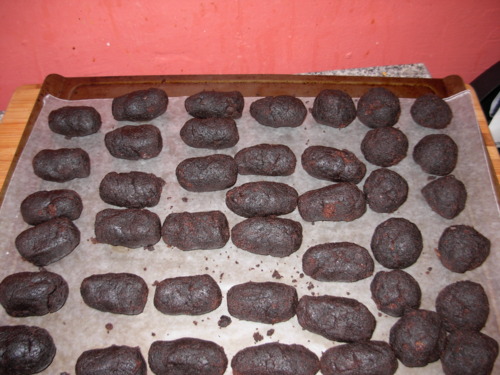
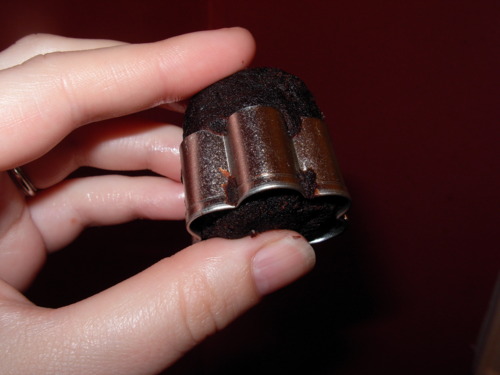
To make the cupcake shape, you’ll push half the oval into the cookie cutter and then carefully push out from the bottom. Most of the ovals were too narrow for my cookie cutter, so I smushed everything to fit into place. Like this:
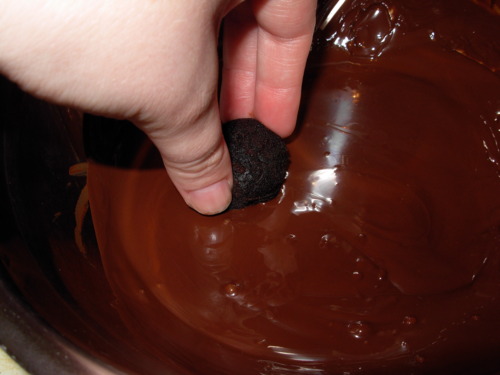
Chill again, while you melt your chocolate over a double boiler. When the chocolate is ready, dip the bottom half in the chocolate and stand the bites upside down. Since, I did not temper my chocolate I needed to place everything into the freezer for 15 minutes to set.
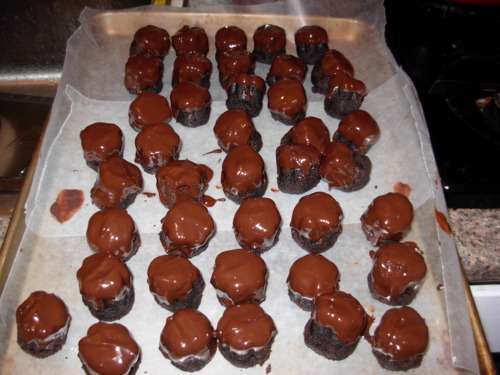
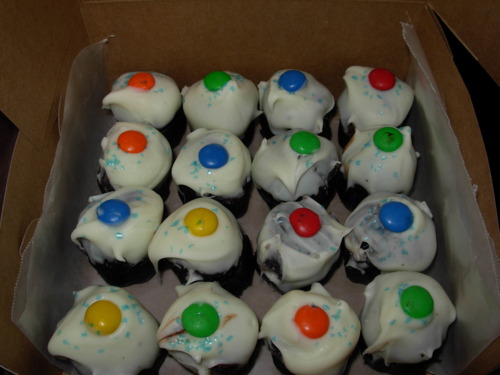
After the chocolate is set, melt the candy melts over the double boiler and dip the top half. Decorate as you go along, since these do set up quickly. This is a messy process though, the heat from my hands caused some of the chocolate to melt a bit. I suggest having a chocolate hand and a candy melt hand. If you had a third person around to decorate great, if not you’ll need to keep wiping one hand clean. Once again, I froze the bites for another 10 minutes to set everything up.
I highly suggest storing these in your refrigerator, they will most likely melt a bit if you don’t. It should keep for about a week.
Inspired by the creator Bakerella, visit her website for more directions and ideas.

